LUNAR OUTPOST
Complete tactical guide for Lunar Outpost. Master this Domination domination map.

// Reference view of Lunar Outpost
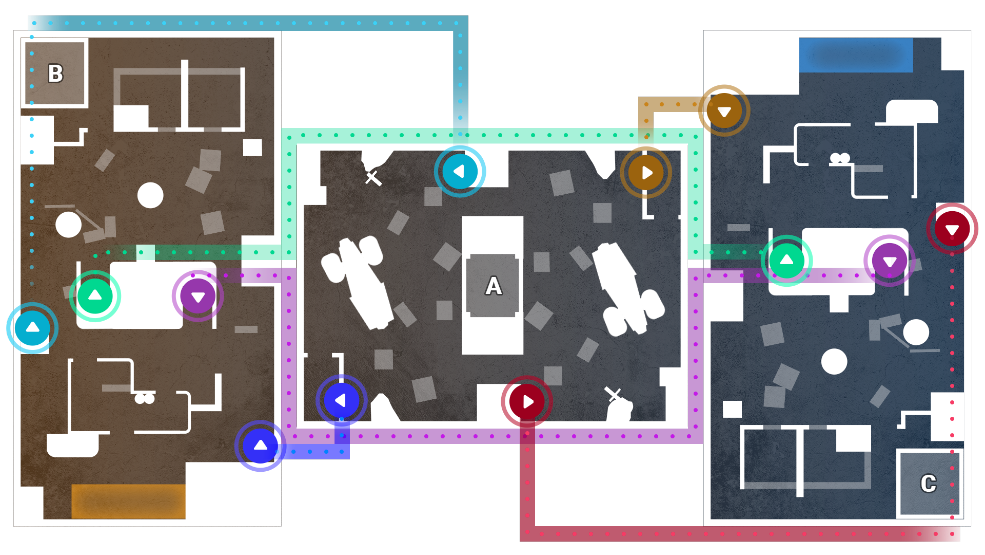
// Green arrows indicate elevators (up/down)
3 points at different elevations: A (central, lower positioned), B and C (team-favored zones at higher elevations)
Each zone at different height with point A centrally located but lower than B and C, creating unique sight line opportunities
All zones visible from each other, enabling cross-zone engagements and overwatch positioning
Multiple elevators connecting all zones, creating dynamic mobility routes and strategic chokepoints
Elevation differences and inter-zone visibility create exceptional long-range engagement opportunities
Success depends on mastering elevator timing, positioning, and controlling height advantages for central point A
Focus on weapons and playstyles that excel in these areas for optimal performance on Lunar Outpost.